Enduring in rough environment
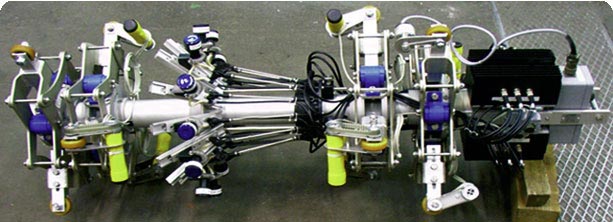
Plastic bearings in an inspection device for offshore drilling riserIn the drilling for oil and gas in the offshore sector, the so-called "drilling riser" connects the offshore platform with the seabed. Thereby many individual risers are flanged together like in an umbilical cord. They convey the media during the drilling process. Moreover they safeguard and guide the drill pipes that run in the interior of the riser's main pipe. As the riser is exposed to aggressive media and high mechanical loads, a regular inspection is required for reasons of safety and environmental aspects. A new equipment delivers reliable results and replaces the conventional, manually operated inspection device. In this high-tech application, the high-performance polymer bearings play an amazing role. The inspection device made by Turboscope Vetco Deutschland GmbH scans the entire inner surface of the extremely stressed main pipe of the riser, semi-automatically in just one work step. Powered centering units move, guide and center the device in the pipe. Highly sensitive special sensors record the condition of the pipe without any contact. Downstream electronics and computer evaluate their signals and document the inspection results. The equipment should therefore be light, reliable and need minimum maintenance. It should be rugged, user-friendly and resistant to corrosion. Moreover it should not be harmed by any pollutants like corrosive products, residual liquid, sand, fat or oil. The prerequisites are likewise applicable to the employed machine elements, for instance to the polymer plain bearings. In order to ensure the required quality, igus® supplied bearing samples free of cost for the design and development and the construction of an initial model. The prototype fulfilled all requirements, in which the igus® products are employed in the centering and sensor systems of the inspection equipment.
The pins of the articulated joints are mounted on "GFM-0810-05" polymer plain bearings. They reliably transmit the high radial centering forces with low friction and free of stick-slip, and minimize the arm system's friction through their integrated initial flanges. Thus the entire centering system works very effectively. The representatives of the product family iglidur® G are generally recommended for extremely high loads, low to medium speeds and when the bearing should be insensitive to dirt.

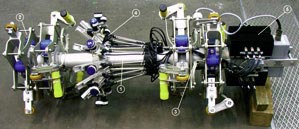
The construction of the inspection equipment is undertaken by Turboscope Vetco Deutschland: 1) Frame, 2) Front centering, 3) Back centering, 4) Sensor system, 5) Electronics
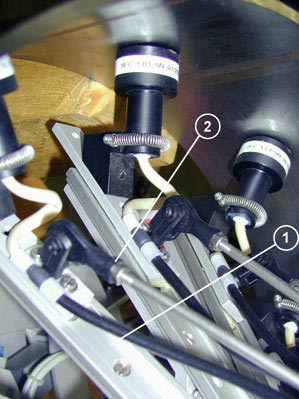
The sensor system comprises many highly sensitive individual sensors that are equally distributed throughout. They work completely free of contact positioned at a certain distance from the pipe wall. Their measuring accuracy is in the decimillimeter range. A central synchronous adjustment enables the accurate, consistent and simultaneous positioning of the sensors in the system calibration and in the nominal width alternations. The core is made up of guide systems and tie rods. Every individual sensor is seated on its own miniature guide system of the type "NK-02-27". The carriages in the extremely flat DryLin® N guides of various widths run without fat or oil in an anodized aluminum C profile. The lightweight construction and the low wear with low coefficients of friction are especially impressive. To mention just few more advantages, high speeds and accelerations are possible. Adjustable tie rods connect the gliding carriages to the central adjustment. They comprise rod end bearings with right- and left-hand threads respectively, "EBRM-05" and "EBLM-05". Clevis joints "GERMK-05" serve as counter bearing on both sides. The rod end bearings and clevis joints are set with extremely low clearance to run particularly smooth. So all adjustments on the sensor system are as smooth and delicate as possible; the movements are low-friction and free of stick-slips.

Sensor system of the inspection equipment: 1) Guide system, 2) Tie rod with spherical bearing