Assembly Instructions for E-Chain® System E4/00
Assembling E-Chains® and E-Tubes
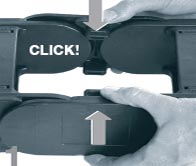
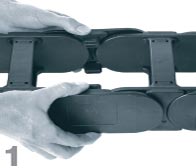
Line up two inner side links, side by side. Attach an outer side link between
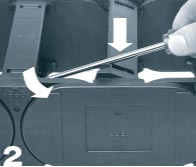
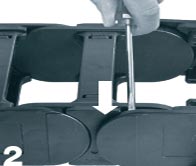
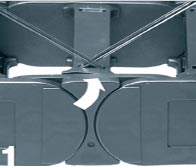
Assemble crossbars - Push down and snap in by using a screwdriver
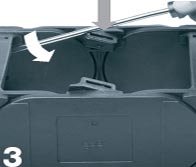
Assemble clips (E-Chains® with crossbars every other link) - Push down and snap in
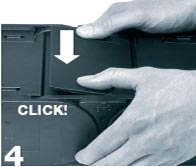
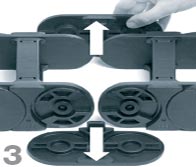
Assemble E-Tube lids/bottoms - Attach to the connector at an angle - Snap in
Separating E-Chains® and E-Tubes
Remove crossbars, clips, lids and bottoms at the outer links...
...guide the screwdriver into the slot between side links and release it by levering ...
...remove the outer links to the side...
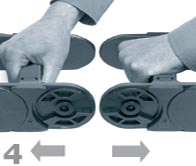
...and separate the E-Chain®
Opening E-Chains®
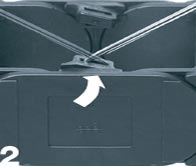
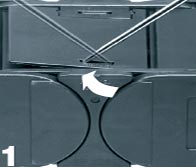
Remove crossbars - Insert screwdriver into the slot, push down, release by lever action
Remove clips - Insert screwdriver into the slot and push down, release by lever action
Opening E-Tube
Remove lids/bottoms - Insert screwdriver into the slot, release by lever action

Release only one side to swivel the lid
System E4 - Installation - Video
Still faster assembly with optional separator with quick release fastener
More than 100,000 products available! Delivery and consultation Mon-Fri from 7am-8pm and Sat from 8am-12pm!